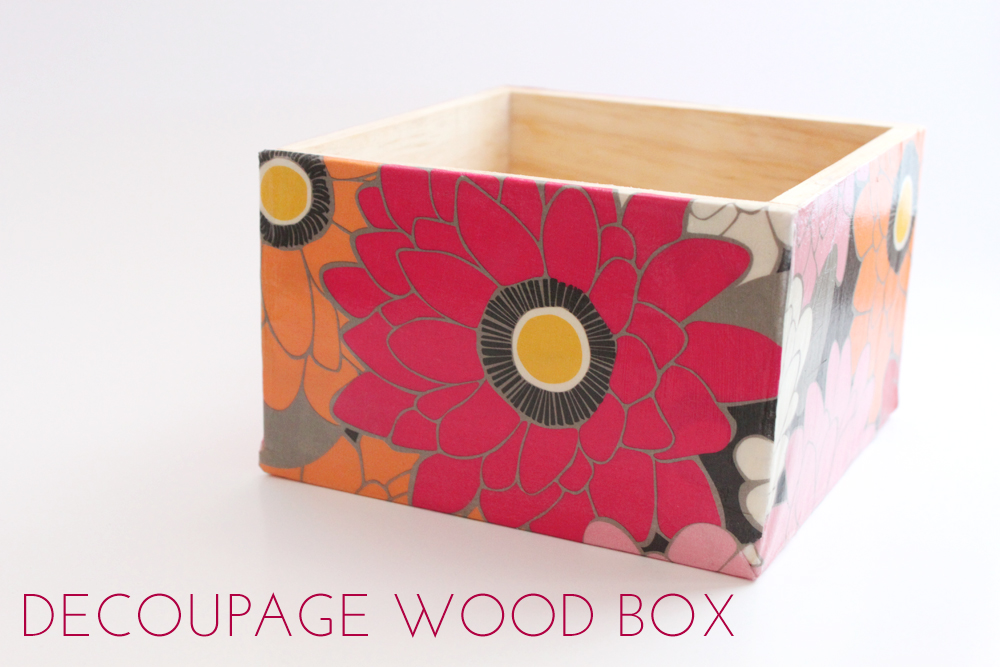
Make this bright and fun patterned decoupage wood box for yourself or as a gift. Seriously, a wood box is so versatile–it can be used for extra storing your jewelry, nail polish or loose change, or can make a great gift (or part of a gift) for a friend. You’ll be surprised at how easy it is to customize this wood box to your own taste. Plus, they’re nearly one-of-a-kind…you won’t be finding these babies at your local Target.

Supplies:
- Patterned paper (mine is from Paper Source)
- Mod Podge
- Unfinished Wood Box (mine is from the Target dollar section)
- Sponge Brush
Optional:
- Sandpaper
Step 1. Cover your wood box in a layer of Mod Podge to help give it a smoother surface to work with. Wait 15-20 minutes for it to dry.
Step 2. Lay the dry box out on the patterned paper, pretty side down. Using a pencil, lightly trace the outline of the box onto the paper.
Step 3. Once completed, try wrapping the paper around the box to see where the excess paper needs to be cut. Your best bet will be to cut the corners at 90 degree angles, making sort of a cross or “plus sign” (+) design. Once you’re happy with the layout, trim the excess paper.

Step 4. Start spreading a medium layer of Mod Podge all over the box and sticking the paper to the box. Wait 15-20 minutes for this to dry once completed. After it has dried, check to see if there are any spots where the paper is lifting and add more Mod Podge there.
Step 5. Layer, layer and layer the Mod Podge on some more until you are satisfied with how well the paper is sealed. You may find yourself putting on 10 layers, and that’s OK! I recommend waiting in between layers for everything to dry.
Step 6. Sand the box down if you’d like. I gently sanded my box but found this step pretty unnecessary as it didn’t really help much. If there are dried up clumps of glue on your box, then sanding will help, but it won’t really remove the lines you see. [I used a 320/very fine grit sanding block]
That’s it! Now you’ve got a finished and very pretty wood box for whatever you please! What do you think? Pretty simple craft, right? I’m not ashamed to share that I feel like making a couple more of these! They would look really cute a shelves above a desk for CDs or other knick knacks.
—
©thesassylife, 2013. | Permalink | 2 comments | Add to del.icio.us


